
How to Insert Google Ads in Your Website
Are you looking to monetize your website with Google Ads? If so, you’ve come to the right place. Google Ads is a powerful tool that can help you earn money by displaying ads on your website. In this detailed guide, I’ll walk you through the entire process of inserting Google Ads into your website. Let’s get started!
Step 1: Set Up a Google Ads Account

Before you can start displaying ads on your website, you need to create a Google Ads account. Follow these steps to get started:
- Go to Google Ads and click on “Start now.”
- Sign in with your Google account or create a new one.
- Enter your website URL and choose the appropriate account type (e.g., “Website”).
- Fill in the required information, such as your business name, address, and payment details.
- Accept the terms and conditions, and you’re all set!
Step 2: Create an Ad Group
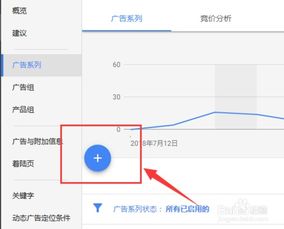
Once you have your Google Ads account set up, it’s time to create an ad group. An ad group is a collection of ads that share a common theme or goal. Here’s how to create one:
- In the Google Ads dashboard, click on “Campaigns” and then “Create campaign.”
- Select the campaign type (e.g., “Search network” or “Display network”).
- Choose your ad group settings, such as the ad format, bidding strategy, and budget.
- Enter a name for your ad group and click “Save and continue.”
Step 3: Create an Ad

Now that you have an ad group, it’s time to create an ad. An ad is the visual content that will be displayed on your website. Here’s how to create a basic ad:
- In the ad group you created, click on “Create ad.”
- Select the ad format you want to use (e.g., “Text ad” or “Image ad”).
- Enter the ad text, including the headline, description, and display URL.
- Upload an image if you’re using an image ad.
- Review your ad and click “Save and continue.”
Step 4: Add the Ad Code to Your Website
Once you’ve created your ad, you need to add the ad code to your website. This code will generate the ad on your website. Here’s how to do it:
- In the Google Ads dashboard, go to the ad group you created.
- Click on the ad you want to add to your website.
- Under the “Ad extensions” section, click on “Get ad code.”
- Copy the ad code provided.
- Paste the ad code into the HTML of your website where you want the ad to appear.
Step 5: Monitor and Optimize Your Ads
After you’ve added the ad code to your website, it’s important to monitor and optimize your ads for the best performance. Here are some tips:
- Track performance: Use Google Ads’ reporting tools to track the performance of your ads, including clicks, impressions, and conversions.
- Adjust your budget: If certain ads are performing well, consider increasing their budget. Conversely, if some ads are not performing well, you may want to decrease their budget or pause them.
- Test different ad formats: Experiment with different ad formats, such as text ads, image ads, and video ads, to see which ones work best for your audience.
- Optimize your landing pages: Ensure that the landing pages associated with your ads are relevant and provide a good user experience.
By following these steps, you should be able to successfully insert Google Ads into your website and start earning money. Remember that it may take some time to optimize your ads for the best performance, so be patient and keep experimenting with different strategies.

